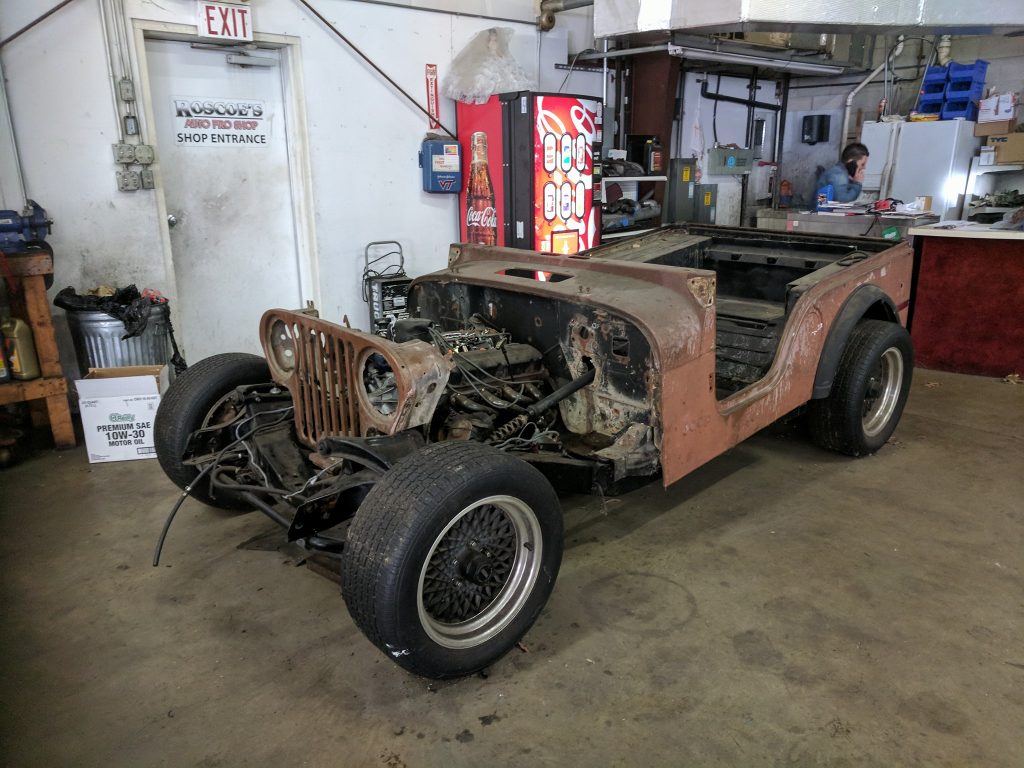
“Stumper” an explanation for the jeep rat rod thing in the corner of our shop.
This whole project started a few not so short years ago with a relatively simple idea:
“After years of wishy-washy feelings towards modifying this car or that, I decided that I may have more motivation and better results making the whole car, more or less… Goals: Handle and stop like a Vette, Look like a jeep (sorta) and go like a mustang on Jenny Craig.” – Roscoe
At that point and time in life, I had the workspace, the free time, and the necessary resources to build something NICE. Since this post on Roscoe’s, you know that is not what happened. Instead, I chose to build the best thing I could cobble together using mostly parts from the junk cars we had laying around the storage lots.

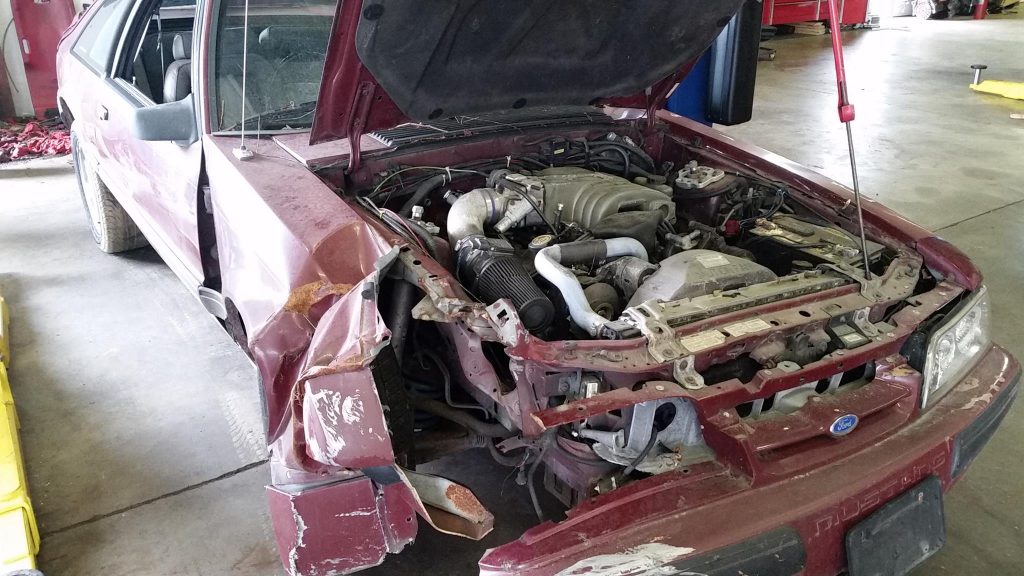
Any good project car needs power and since its one of our builds, the back story is just as important as the dyno sheet. According to the (ex) girlfriend of the former owner of the car, this was used by her drunk boyfriend to run from the cops. This chase came to a brief (but not final) stop when he took out a fire hydrant. However, all hope was not lost in this crash as he was far enough ahead to get the car unstuck and even get home before the cops arrived with time to spare allowing him to open another beer. Since the car was in her name (not his) and he was in jail (for now) we knew if we did not buy it someone else would, so why not? The car was your run of the mill 5.0 Mustang with a loud exhaust and some bolt-on’s featuring a more-fun manual 5 speed. Its days of cruising the trailer park and killing traffic cones came to an end the day it killed a hydrant but its story is far from over. The Mustang gave up its engine, transmission, shifter, and a few clutch related items.
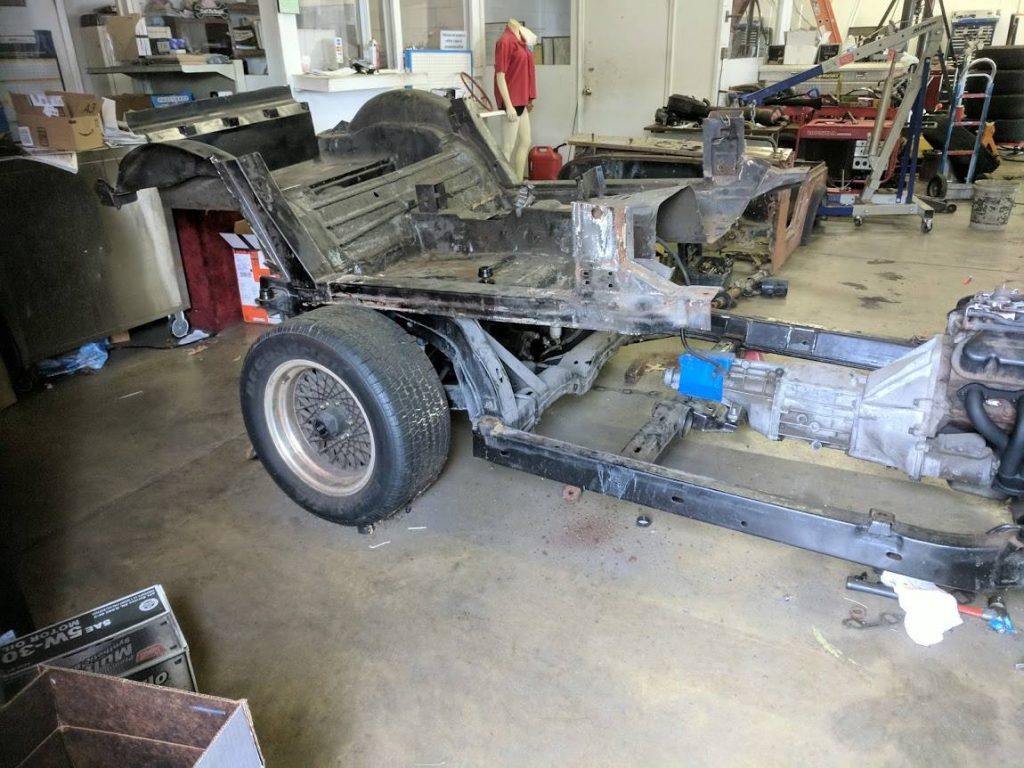
You can have all the power in the world but without a good chassis to manage it, you won’t get far down the road at any speed. To get the best handling most braking at the least possible weight for a junkyard build, I chose to work with a stripped out 1978 corvette we had behind the shop. It came to us as a more or less driveable corvette
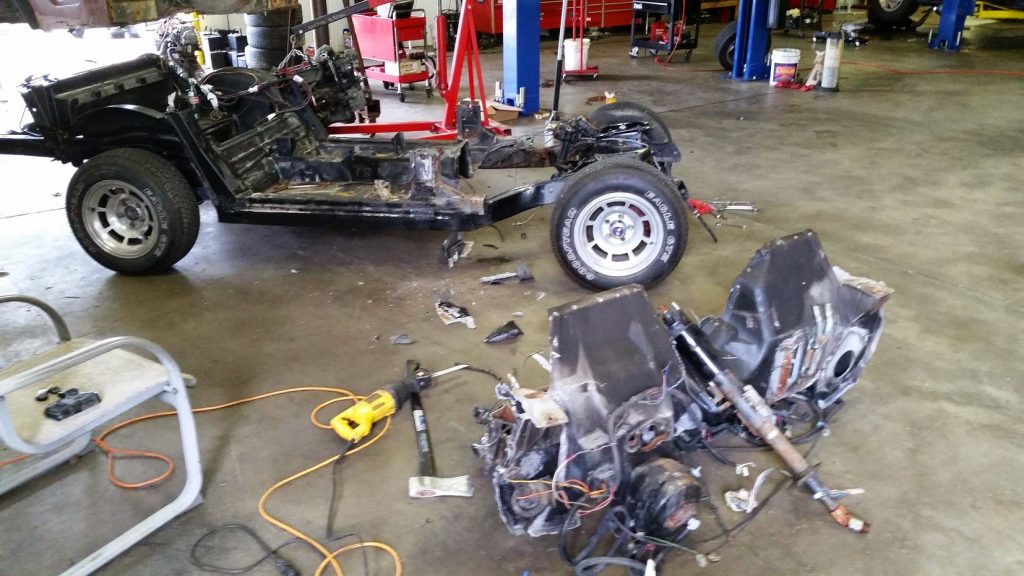
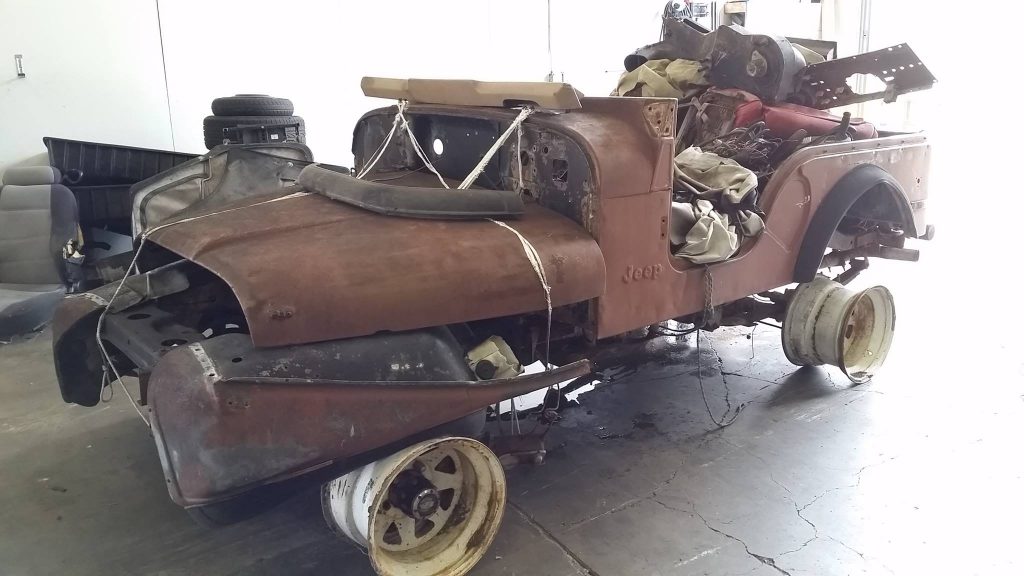
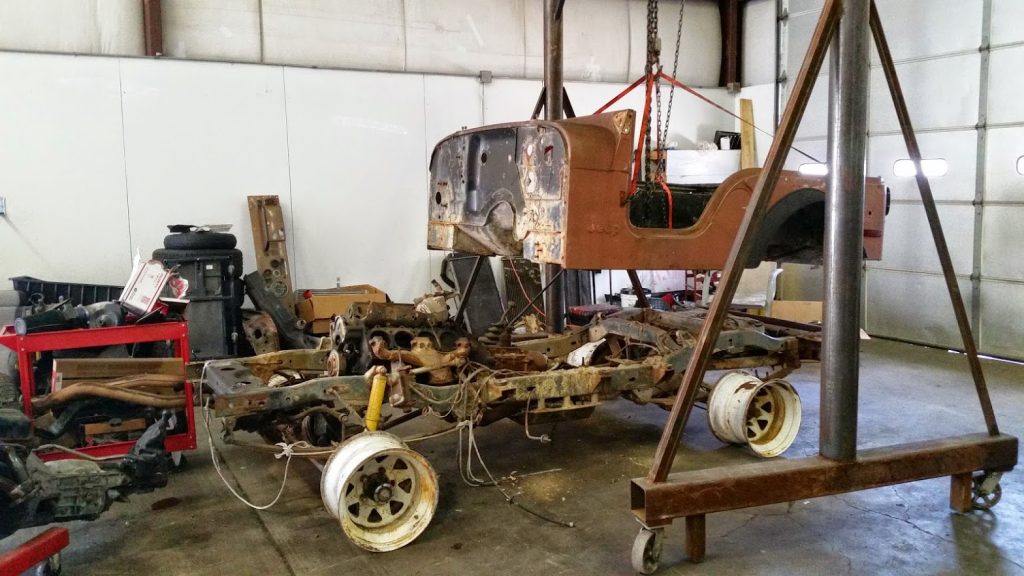
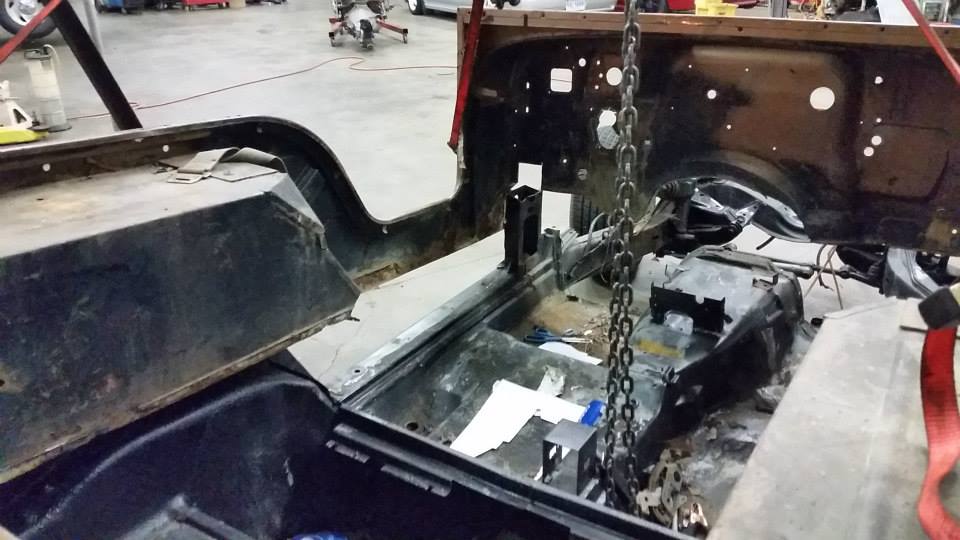
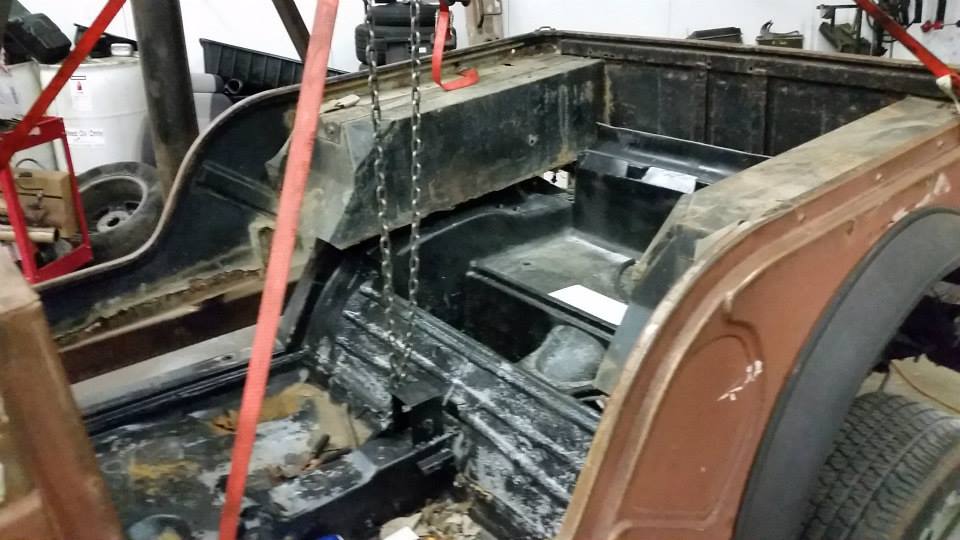
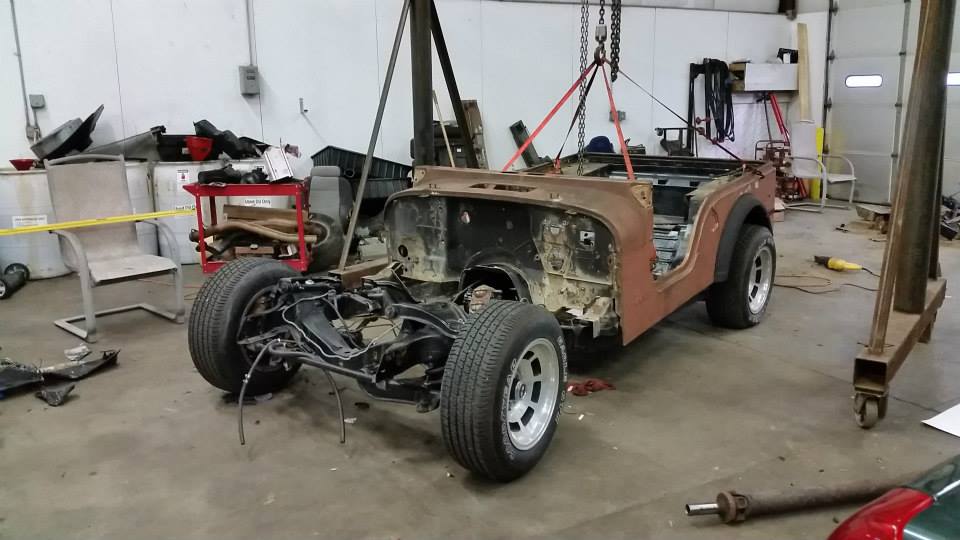
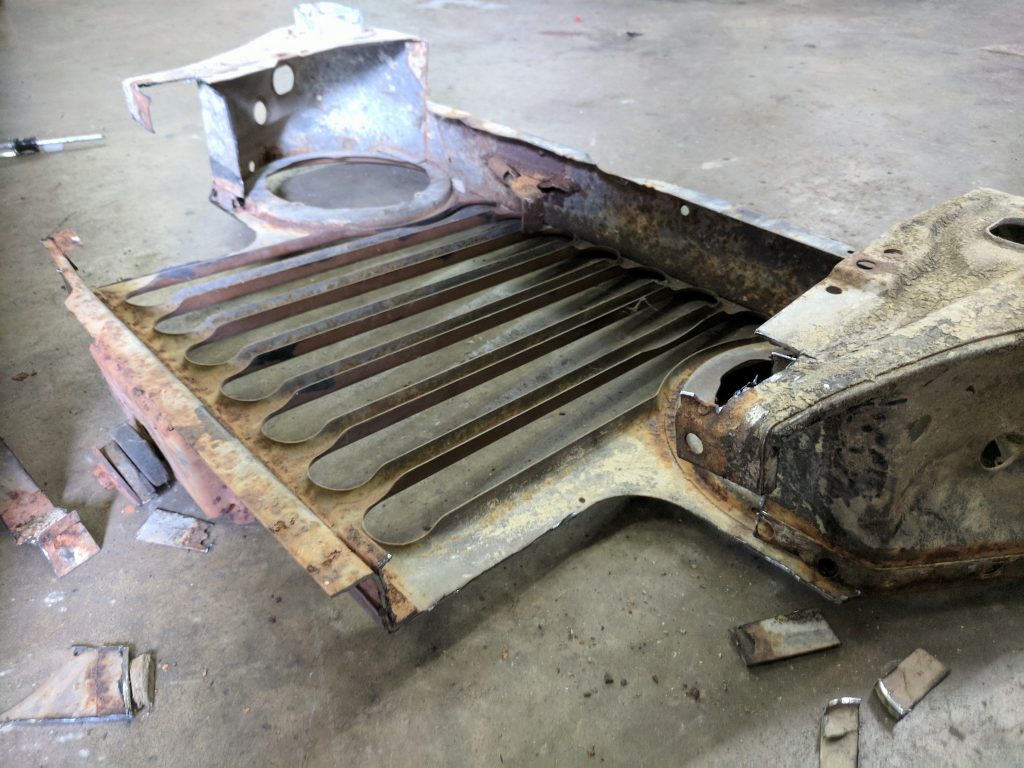
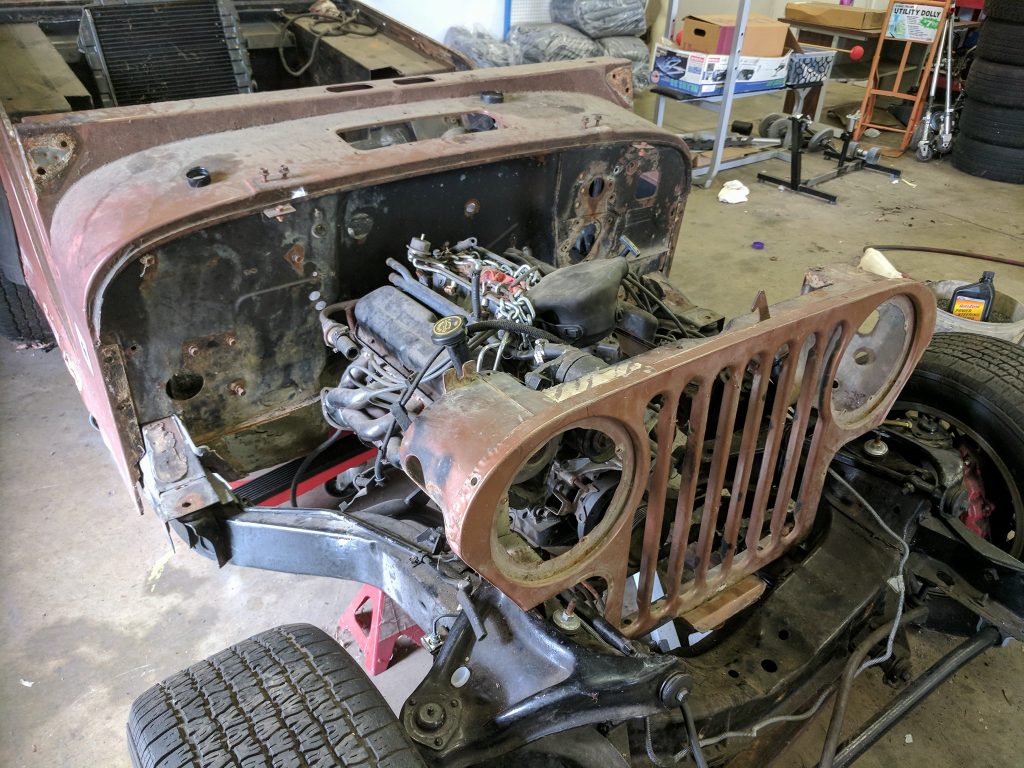
While an engine makes the power and a chassis gives it a place to go, a build is often really only as cool as it looks. Clearly a rat-rod build I was wanting to make a nod to the look of the old T buckets but wanted to do something more original. With a Jeep CJ-5 rusting in pieces (literally) in one of our storage lots the opportunity was present to give this thing a unique look all its own. This may not be the first time someone built a jeep rat rod, but it may the first one built with a positive driver-experience in mind. The Jeep was mostly already apart as the previous owner had already taken it all apart for a “restoration” that never got completed. More was kept from this then most expect to hear. In addition to the tub, I also saved all of the pedal assemblies, the dash (complete with a bullet hole), all the HVAC parts, the grille shell
With the major components on hand, the more or less basic task of fitting the parts together could start!
Since pretty much none of these parts will fit together the primary tools needed are various hammers, saws, grinders, and at some point along the way maybe a welder to make some of this crap stick together well enough to break a few laws.
The idea is to cut away enough of the jeep, and the Corvette floor to get the two halves to fit together more or less like the old plastic model kits did then frame up the difference well enough to make it as safe as the Corvette was. That is not a lofty goal to meet.
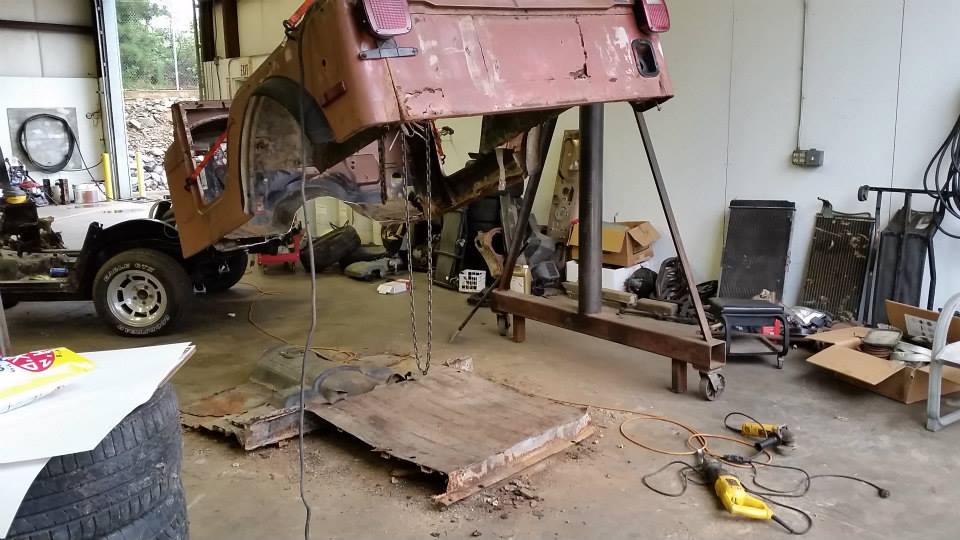
I want it to drive well and be comfortable but have a look that is a tribute T bucket rats. The body was intentionally mounted at an angle to achieve this look while maintaining the corvette’s seating position instead of that of a Jeep or a T bucket.
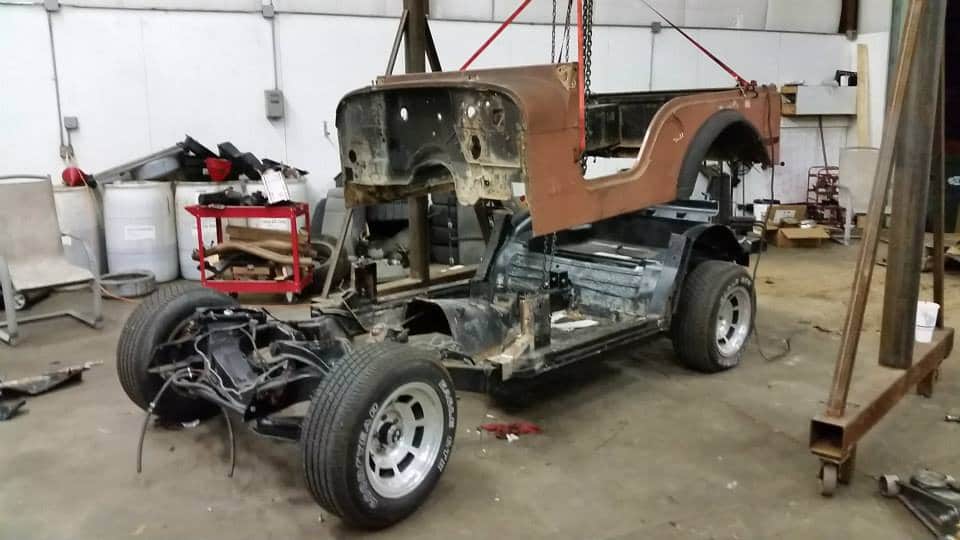
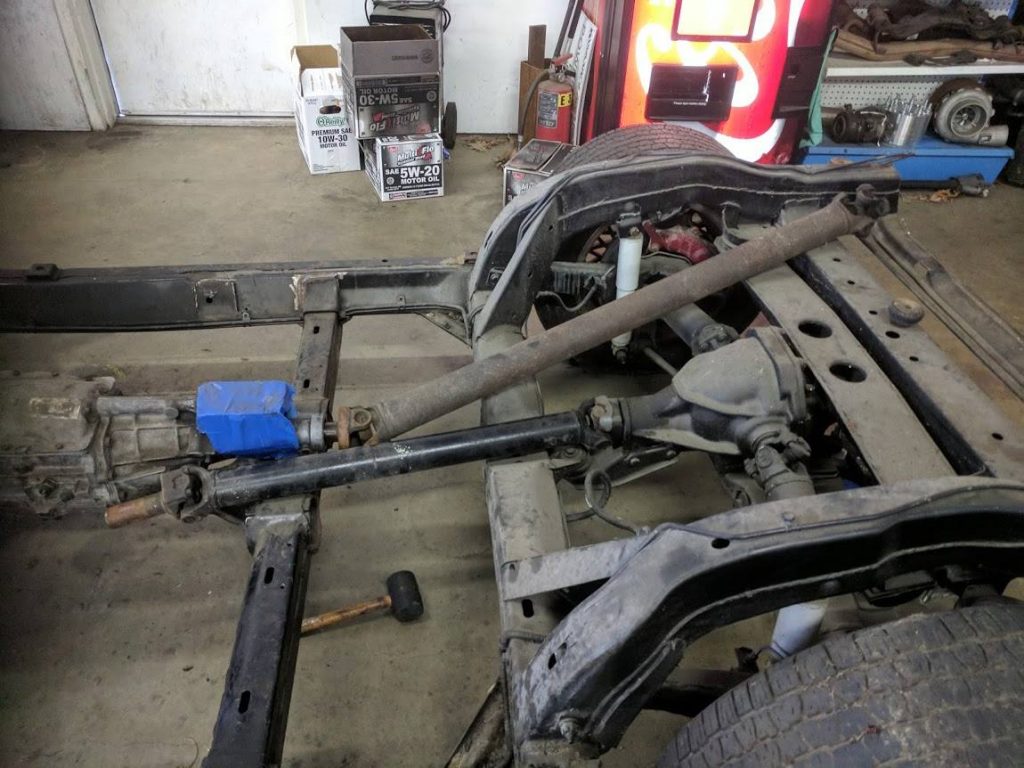
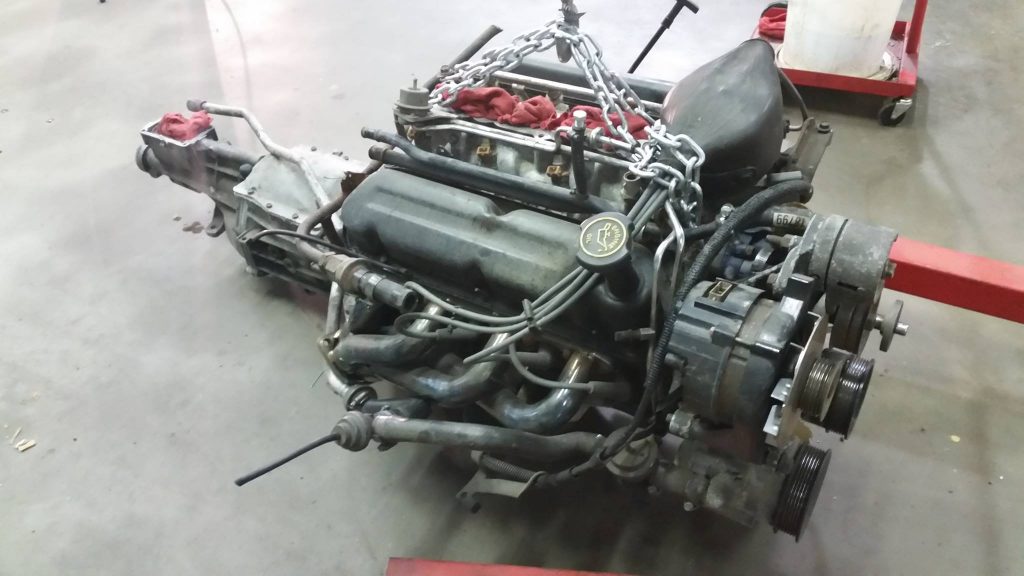
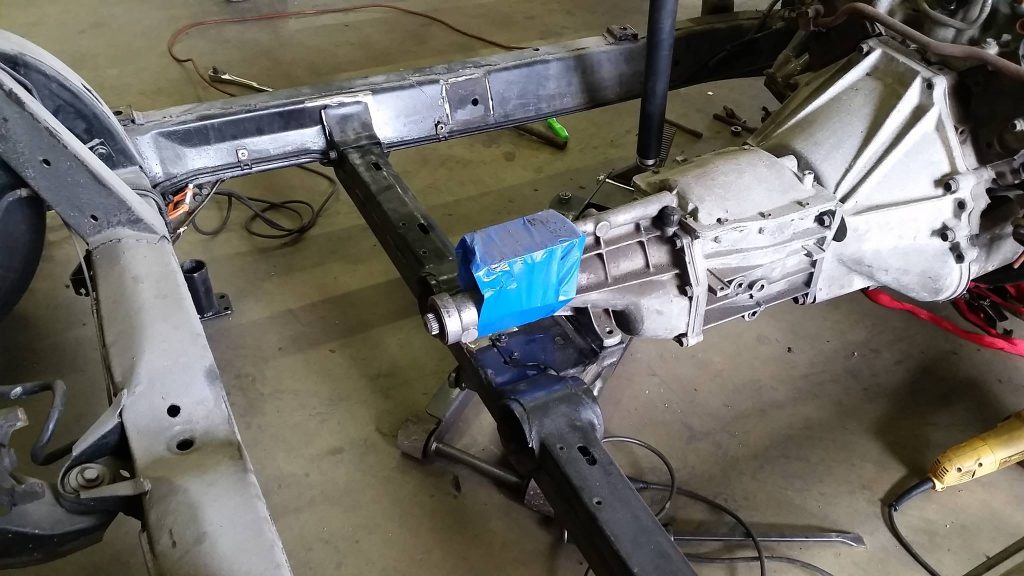
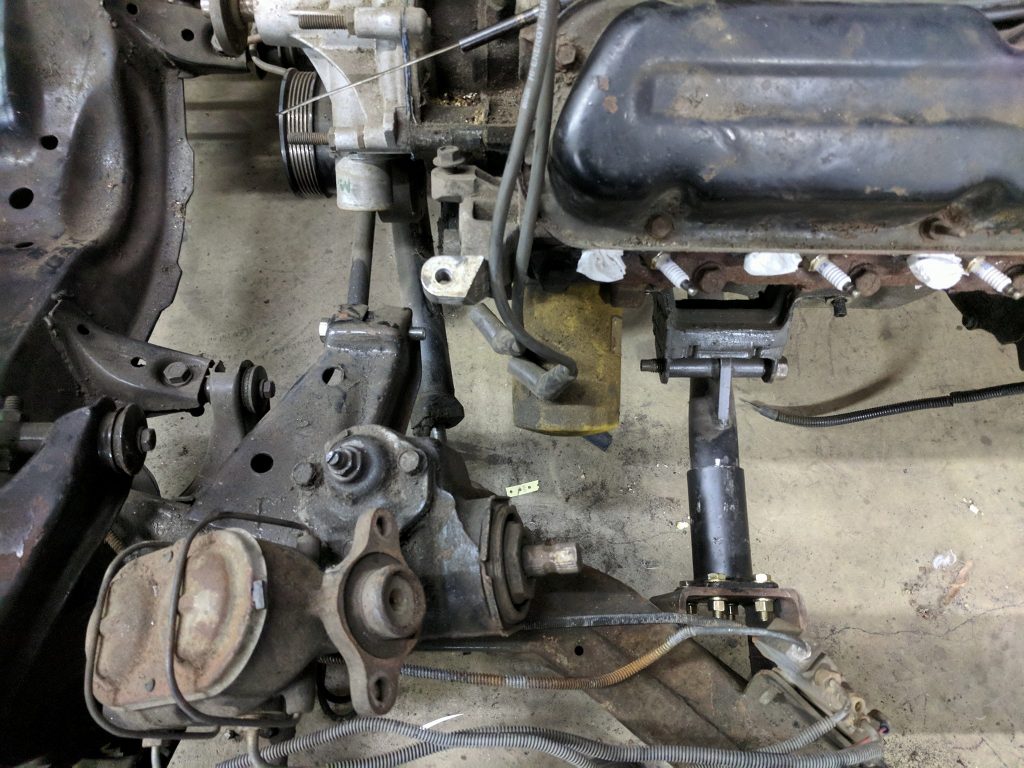
With the position of the body on the chassis was worked out it was time to take a look at the engine and transmission placement. With all of the CRAP that was the Corvette firewall gone, it was apparent there was a good bit of room to move the engine back, WAY back from where the Chevrolet engine was mounted. It ended up going in just about a foot farther back than where the Chevrolet engine had previously been mounted still leaving room to use the factory Ford fuel injection with
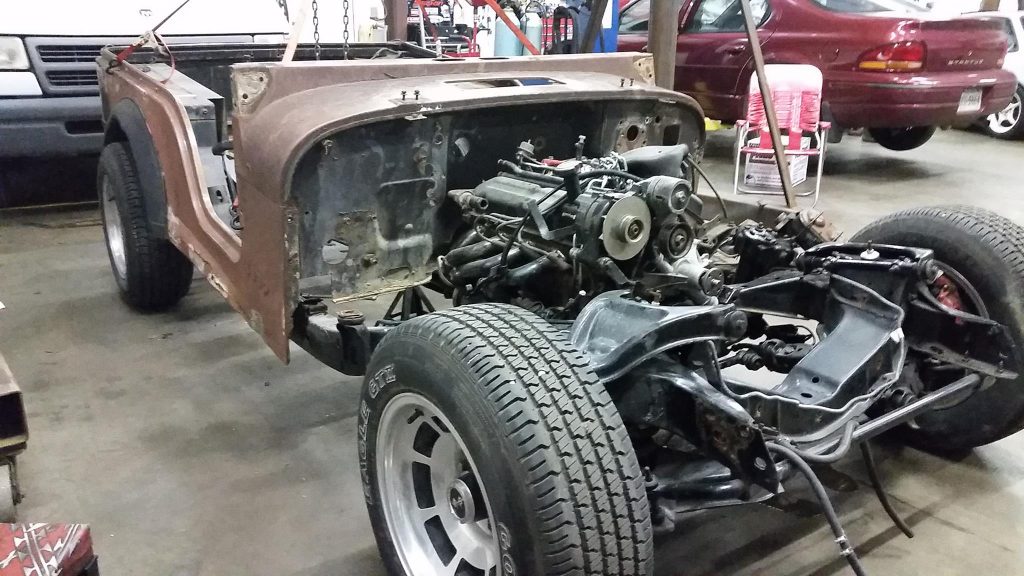
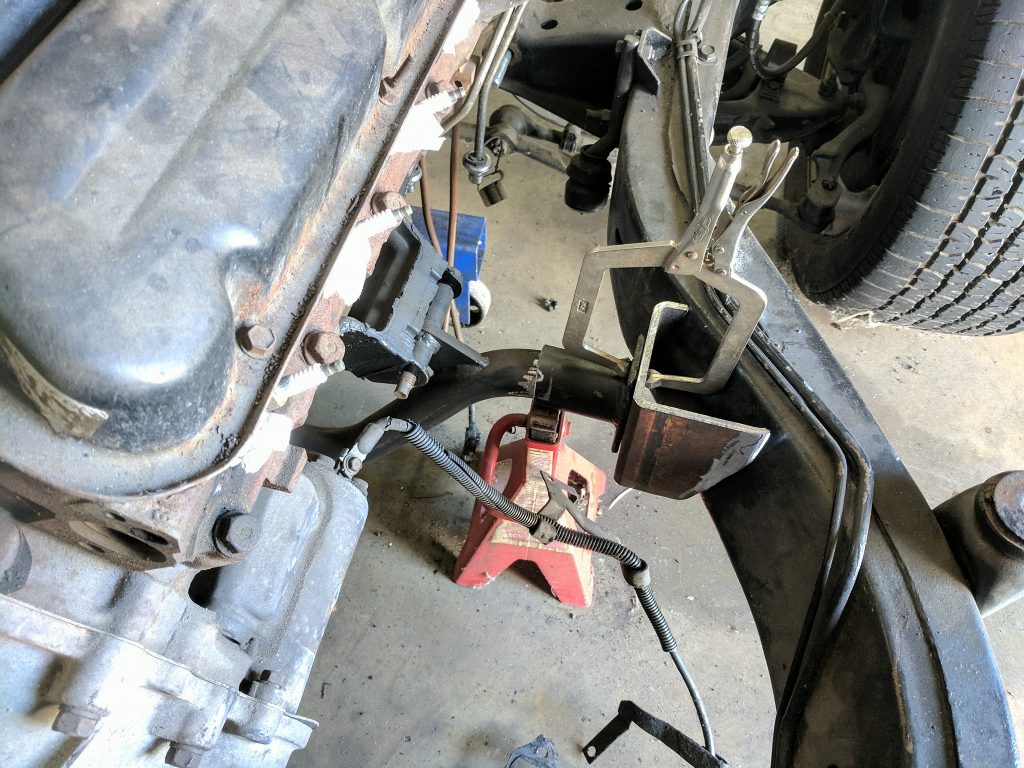
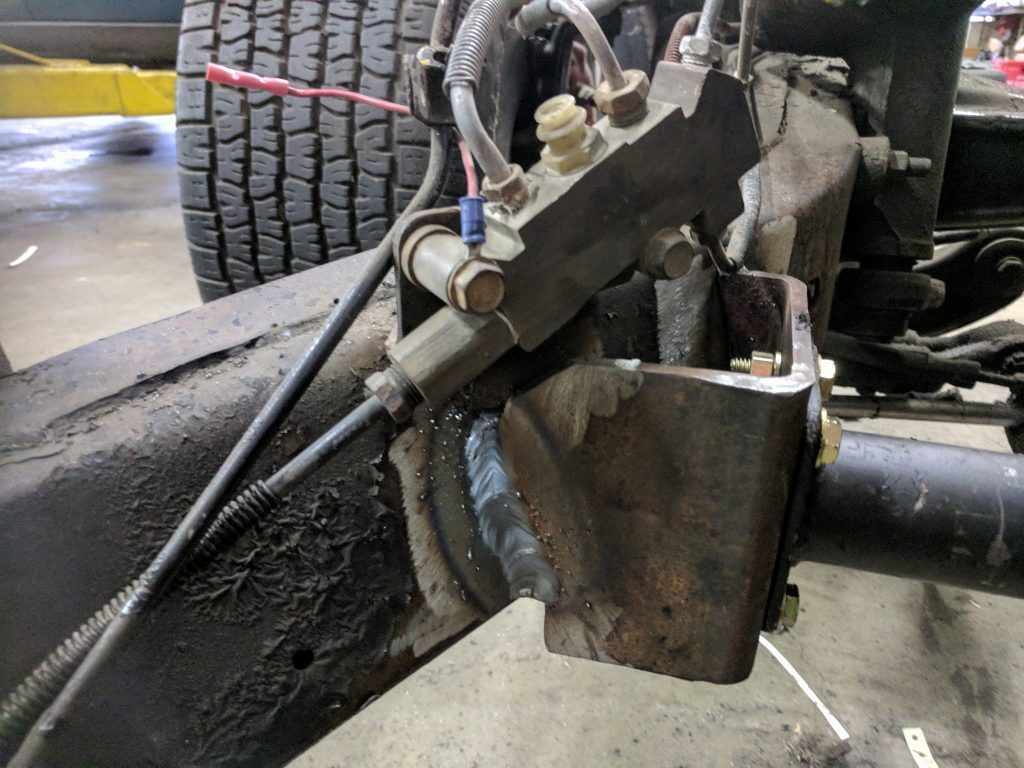
The mock-up work was complete, it was time to start attaching the square pegs to their round holes. The factory transmission cross member had to be moved back and modified to bolt up to the transmission from the Mustang. With only minor cutting, it was easy to move the original cross-member mounts back about a foot and weld them back in place as if it was meant to be there. To add strength (and safety) it was decided to go with a full engine cross member rather than just making mounts that reached out to where the engine was. This worked out well and also added a little protection for the oil pan since in addition to moving back, it also sits a bit lower in the chassis as well.
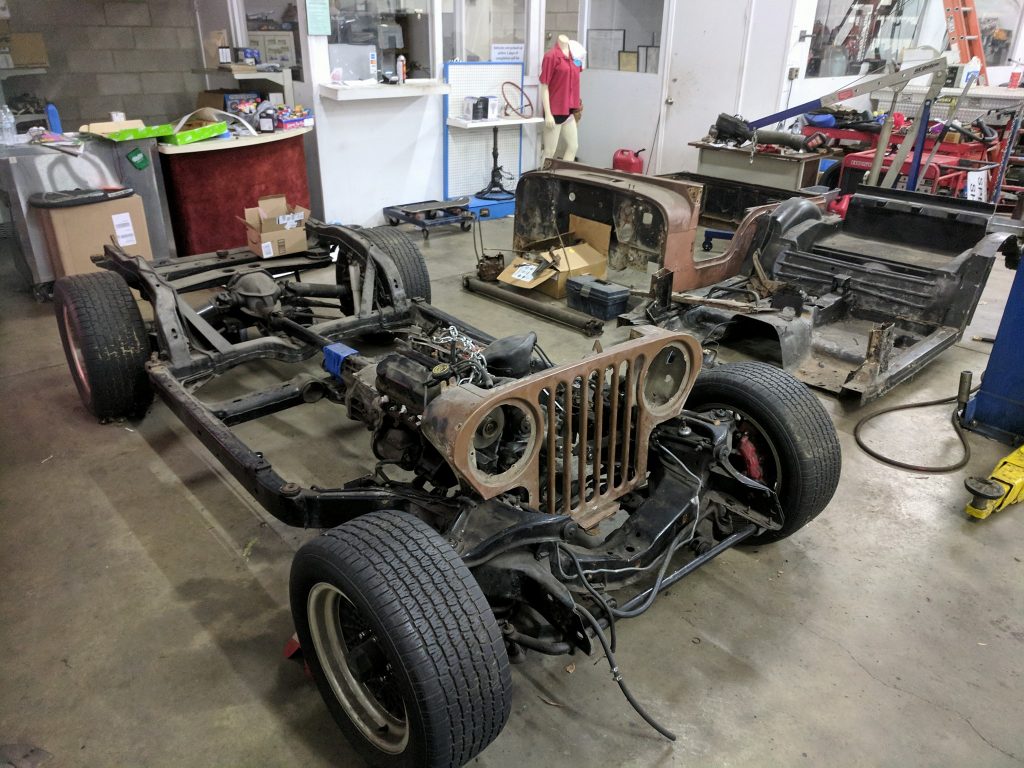
The grill required a little trimming to fit nicely. Exact final position for this will depend on what radiator option is selected but this is approximate.
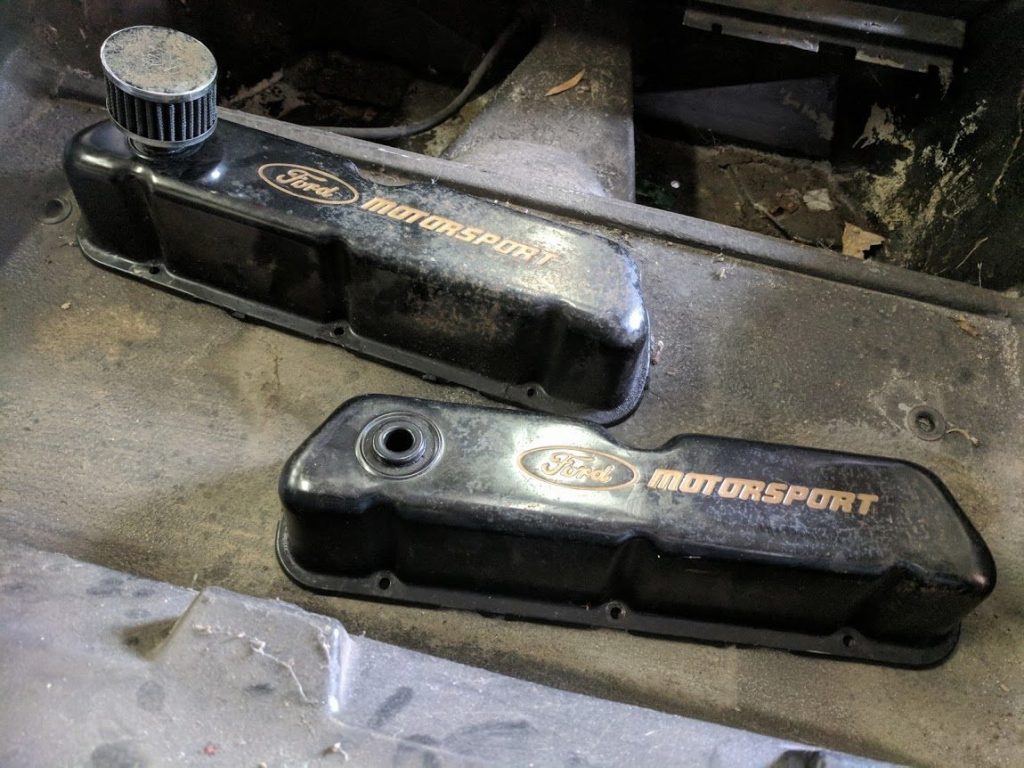
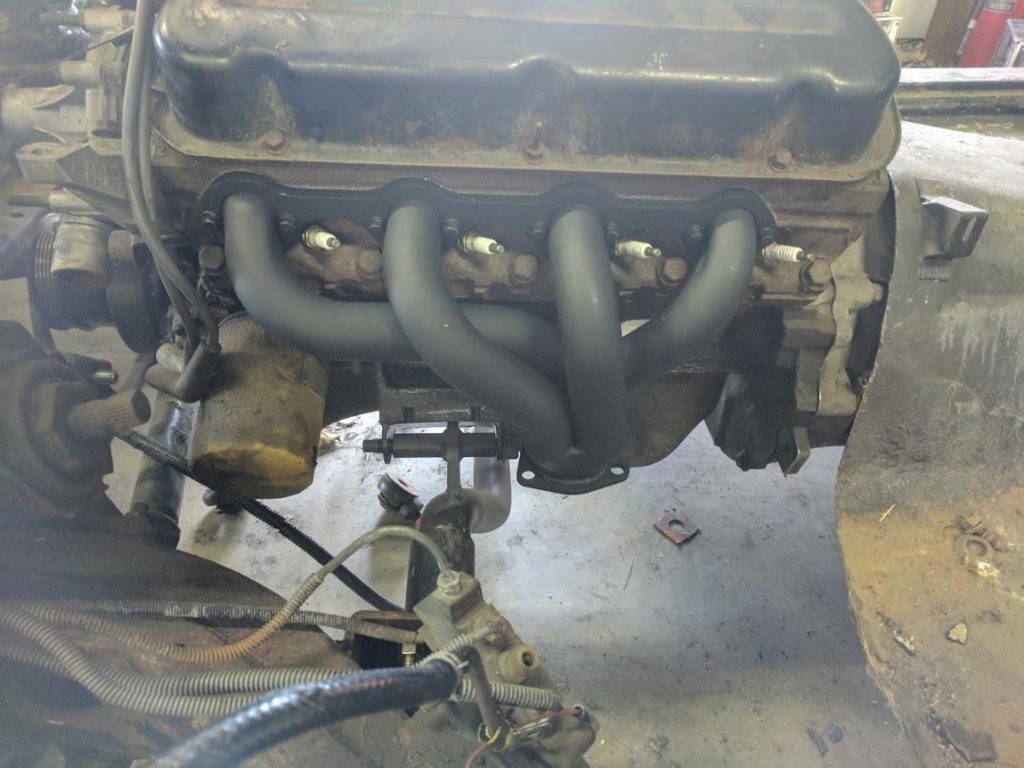
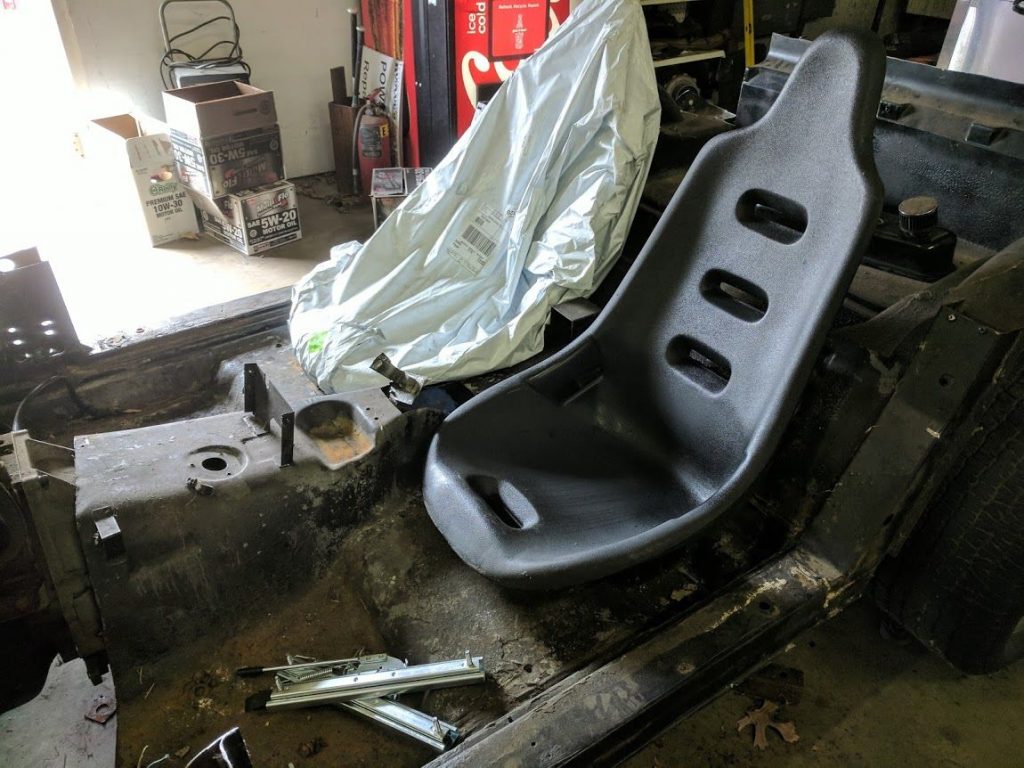
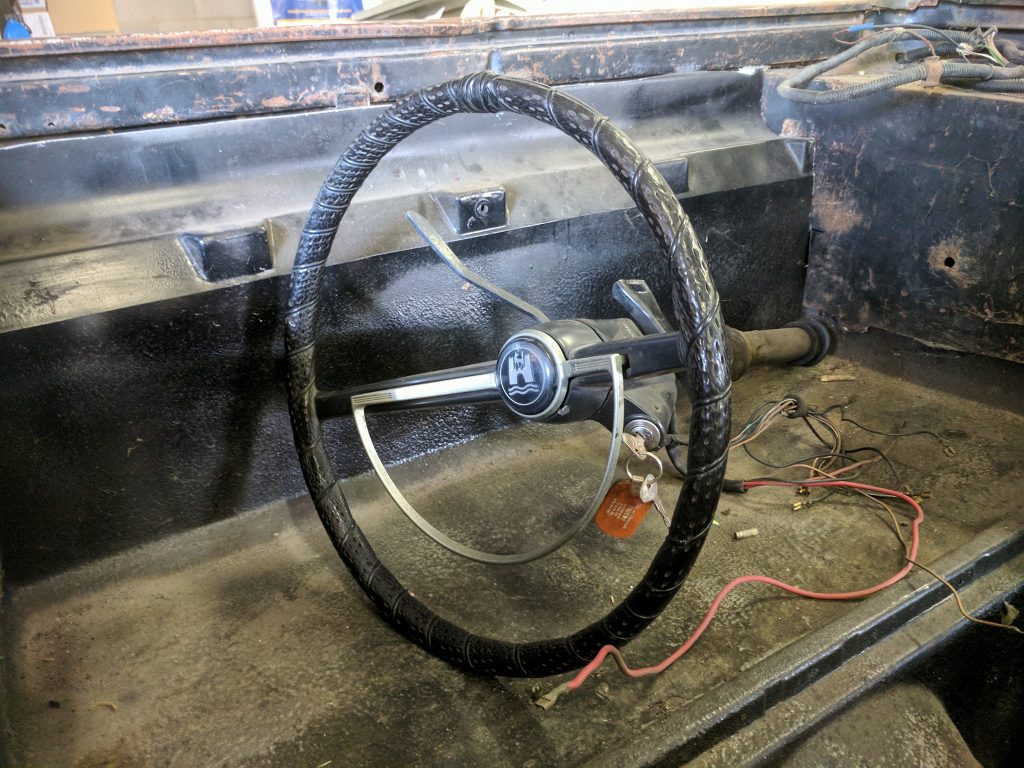
A few new parts have come in to make this go together a little nicer. I went with a VW steering column for a variety of reasons but the two main ones were that I wanted to have a wheel with an old-car feel and the simple electrical connections for the key/signals/horn etc. This one specifically is from a super beetle and the advantage here is the column can be mounted literally in any position I choose and use U joints with the factory collapsible section to connect safely to the Corvette steering box. A few other items were picked up such as some new Corvette body mounts, headers that give us better clearance at the floor, valve covers that help identify this as a Ford engine and some seats complete with adjustable sliders for “comfort” and safety.
With less free space in the shop and even less free time in my schedule to devote to this project the progress is SLOW but does happen a little